In the making of my team’s space shooter project Datepocalypse I did a simple prototype of the two avatar’s shooting function. The reason for this specific artifact was mainly because it was a huge necessity for the main game play and probably also needed some time to “grow” as the game itself start to develop over time.
Starting off it was merely a matter of creating the projectiles at the avatar’s location and make them move in the desired direction. However, this resulted in hundreds (or even thousands) of useless projectiles allocating memory which never would be used again.
The Solution to this problem was to add each created projectile to a vector (or array) and as it left the visual screen it would be deactivated and added to the bottom of the list to be reused the next time a projectile was needed. This way there would be a quite low quantity of projectiles to keep track on for both of the avatars.
Moving on to the actual feel for the shooting mechanism, which was at this point very flat, some concerns appeared. The projectiles where just moving in straight lines and didn’t really give much feedback to the player and even though the bullets where flying at great speed it felt more or less: Boring!
The fix: Every fired projectile got a small spread in its direction and the player started to shake a bit left and right to give a sense of the player weapon being just a little bit to powerful for the avatar to hold steady. This felt good, but not great. The player needed more feedback.
Some testing with the shaking led to giving the player a little knock back to emphasize the weapon recoil. Also, lowering the player movement speed as he/she was shooting gave the firing ability a stronger illusion of the weapons power as more focus was drawn to firing rather than moving. To even further increase the power feeling I also added some minor screen shake at every shot.
At this point the feel for the main weapon prototype was nearly complete and even though the in-game graphics only consisted of place holding boxes with nothing to shoot at it actually started to feel “fun”.
The last small adjustment (and tip to anyone still reading) was to make the bullets larger. When making a seemingly powerful weapon, even if the weapon shoots tiny darts, and the screen is shaking and there is even a knock back from the weapon recoil, just try to make the bullets bigger. The difference may be night and day.
Thanks for reading!
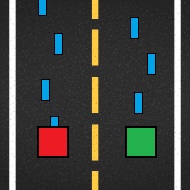
(Sadly, this image doesn’t really represent the final feel of the prototype. However it’s worth pointing out that the graphics wasn’t necessary to achieve the level of “fun” needed for this specific prototype)

Jag tycker du förklarade bra vad, hur och varför du gjorde som du har gjort för att lösa första problemet i din artefakt. Du använder dig utav en vector array för att kunna återanvända projektilens ”allocating memory” och slippa onödig ”allocating memory”. Jag själv skulle dock tycka att det skulle bli lite mer tydligt vad som har hänt om du har med i blogginlägget en liten bit av den koden som löser problemet. Skulle också vara intressant och veta vad detta problem skulle göra angående spelupplevelsen t.ex. skulle spela börja gå långsamt p.g.a. alla projektilsminnen som flyger runt utanför spelet? Annars förklara du bra vad som hjälper mot onödig ”allocating memory”.
I problem två berättar du hur du löste problemet med en livlös ”shooting mechanics” där du ger bra tips, huvudsakligen genom att ge mer ”feedback” på vad som händer till spelaren. Först genom att du lägger till att projektilerna ger en liten ”knock back” till spelaren och även att projektilerna har en liten spridningsradie när spelaren skjuter detta tycker jag är väldigt bra tips på hur man kan förbygga tråkiga,livlösa projektiler och även ge en känsla att projektilerna har lite kraft bakom sig. Som du berättar i blogginlägg att bilden inte riktigt representera så bra hur slut prototypen blev, kan du ha med en ”gif” till nästa gång som kanske kan representera det bättre. Jag tycker du har gjort ett bra jobb med att förklara vad, hur och varför du gjorde som du har gjort i din artefakt och du ger även några värdefulla tips till läsaren ifall hen skulle stöta på samma problem.
LikeLike